-

Qualtrics Platform -

Customer Journey Optimizer -

XM Discover -

Qualtrics Social Connect
Building a Consent Form
About Building a Consent Form
It’s common practice to ask for a respondent’s consent before sending them to the rest of the survey. Of course, if they decide they don’t want to participate, we want to end their survey session.
There are two ways to build a functioning consent form in Qualtrics. The first way is for users with more simple surveys. The second way is for users with more complex study designs.
Building a Consent Form for a Simple Survey
Is your survey fairly straightforward? Do you send all respondents through the same questions, or only hide a few here and there with display logic? If so, the consent form described in this section is the best one for you.
- Create a new survey project.
- Make sure the first question is selected.

- Change the choices to 2 by typing the number, clicking the minus sign ( – ), or deleting one of the choices.
- Click the text of the choices and change them to the desired options. For example, type “Yes” and “No,” or “I consent” and “I do not consent.”
- Click where it says Click to write the question text and enter your consent form, terms and conditions, etc.
Qtip: Do you have a PDF or another file with your consent form already typed out? You can insert a downloadable file for your respondents.
- Under Question behavior, select Skip logic.

- Select End of Survey.
- Select the choice that means consent has been given. For example, here it’s simply “Yes.”

- Select Is NOT Selected.
- Click Confirm.
- In the question editing pane to the left under Response requirements, select Add requirements and then Force Response. This option will not let respondents proceed through the survey until they read through the terms and conditions, and either provide consent, or deny it.

- You’re officially done with your consent form. Feel free to add the rest of your questions below it.
Qtip: You don’t even need to add a page break between the consent question and the rest of the survey – Skip Logic automatically creates it for you.
Building a Consent Form for an Advanced Survey
Are you doing A/B testing, or randomizing blocks of content? Are you sending respondents down entirely different paths based on answers they provided? Have you added screen-outs or customized end of survey messages based on what respondents answer? In that case, you should use the consent form described in this section.
- Create a new survey project.
- You will want to separate your consent form and the other sections of your survey into different blocks. Click Add Block for each section of the survey you will need. Remember you can add more later if needed.
 Qtip: Click a block’s name to rename it. This can help you organize your content more efficiently. For example, in the image above, there’s a special block where all the personality questions go, and another where the study’s stimuli will be shown.
 - The first block is your Consent block. Select the first question in it.
- Change the choices to 2 by typing the number, clicking the minus sign ( – ), or deleting one of the choices.
- Click the text of the choices and change them to the desired options. For example, type “Yes” and “No,” or “I consent” and “I do not consent.”
- Click where it says Click to write the question text and enter your consent form, terms and conditions, etc.
Qtip: Do you have a PDF or another file with your consent form already typed out? You can insert a downloadable file for your respondents.
- In the question editing pane to the left, select Add Requirements and then Force Response. This option will not let respondents proceed through the survey until they read the terms and conditions, and either provide consent, or deny it.

- Go to the Survey flow.
- On the Consent block, click Add Below.

- Select Branch.
- Click Add a Condition.

- Select Question.

- Select your consent question. (Usually, this is Q1.)
- Select the choice that means consent has been given. For example, here it’s “I agree.”
- Select Is NOT Selected.
- Click OK.
- Click the Add a New Element Here that is indented under the branch.
- Select End of Survey. This determines that if the branch conditions are met (respondent doesn’t consent), they will be sent to the end of the survey instead of being asked to complete it.

- Feel free to add a custom message for people screened out by clicking Customize.
 Qtip: See the End of Survey page for other customization options. For information on the Screen Out Management feature or Panel Company Integrations, see the linked support pages.
 - Click Apply.
- Your consent form is finished. Be careful not to include any other questions in the consent block after asking for consent; instead, create new questions in the additional blocks you added in Step 2.
FAQs
- Should I get consent from a Respondent to collect their personal data?
-
While it is always good practice to receive explicit consent from your Respondents, certain laws and regulations (such as the GDPR) require consent prior to collecting personal data of certain individuals (such as those in the EU). As the survey owner, you must explain why personal data is being collected, for what purpose, and how long the data will be held before being deleted. Also, you must provide contact details to the Respondent. This information may be stated on a privacy policy web page or as a Descriptive Text within the survey.
It is also important to note that under GDPR, consent is one of a number of legitimate interests for processing data. Others include the need to process for the performance of a contract, the need to process in order to comply with a legal obligation, and the need to process in order to protect the vital interests of the data subject or another natural person. Full details can be found in Article 6 of GDPR.
GDPR requires Transparency with regard to the functions and processing of personal data – this is all about giving the individual control over how their data are processed.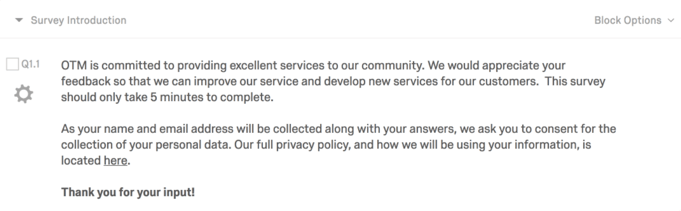
In the Qualtrics platform, you may easily create a multiple choice question to display a landing page and ask for consent. The Respondent can select Yes or No before they proceed with the rest of the survey. That response is recorded with the others, and may be used as evidence that the respondent did, indeed, consent. To ensure that the question is answered, select the Force Response option. If the Respondent chooses No, then add Skip Logic to the End of Survey so no data will be collected.